Rebuild OS to the NX Device
To rebuild the OS on an NX device follow the below steps.
Step 1: Download the 3CX file by clicking the below link.
Debian 10: Download here
Debian 12: Download here
Step 2: Convert the USB Drive with 3CX file to Bootable device using Rufus software. Download the Rufus software using the below link.
Rufus software link: Rufus Official Website
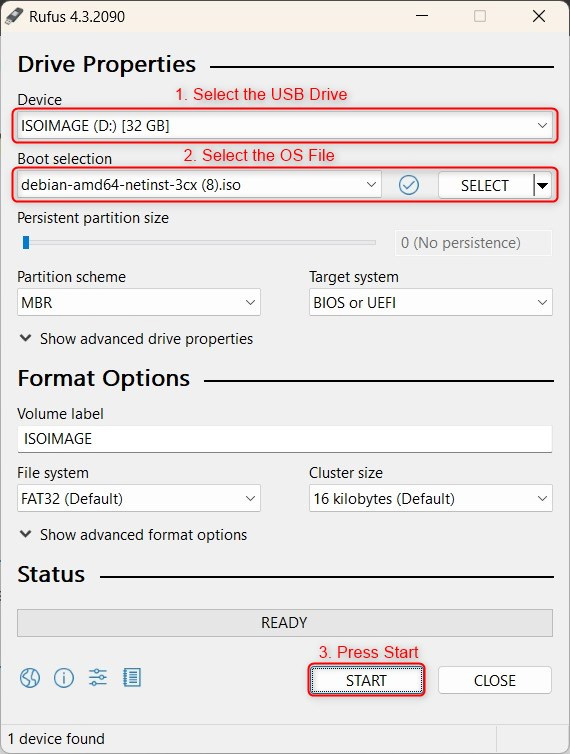
Step 3: Once the drive is ready, connect the USB to the device. Also, connect the device to the monitor using HDMI cable.
Step 4: Connect the Network cable to WAN Port. Also, connect the Power cable & switch ON the Device.
Step 5: Once the Device is Power ON, Press “Esc” button to go the Setup page.
Step 6: In the Setup page, go to “Boot” section & select the USB drive which we connected and Save & Exit the configuration.
Step 7: Select the 3CX file and Press “Enter”. Then, the 3CX file gets loaded.
Step 8: Press “Install”.
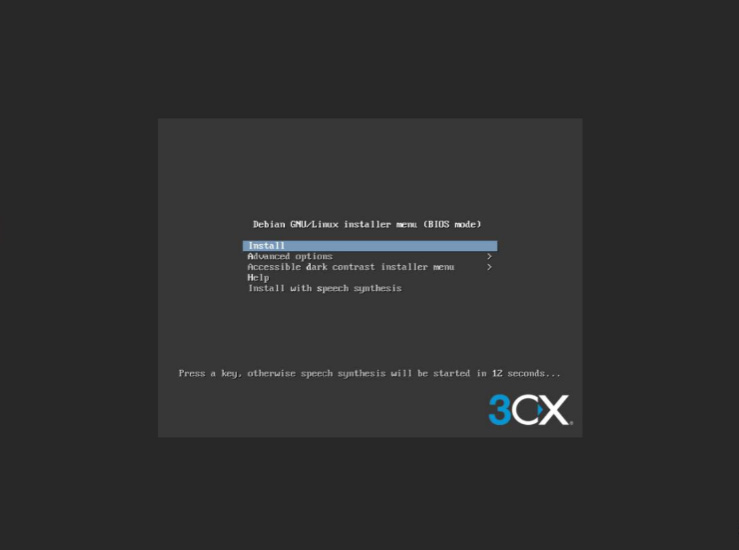
Step 9: Enter the Hostname & Domain name for the machine.(If you want to fix the static IP address just press go Back button on the below screenshot and select manual IP configuration and key in an IP address, Subnet, Gateway & DNS details)
Please Note: The WAN interface should have an internet connection & should have access to the time server & 3CX download site so the files can be downloaded from the internet)
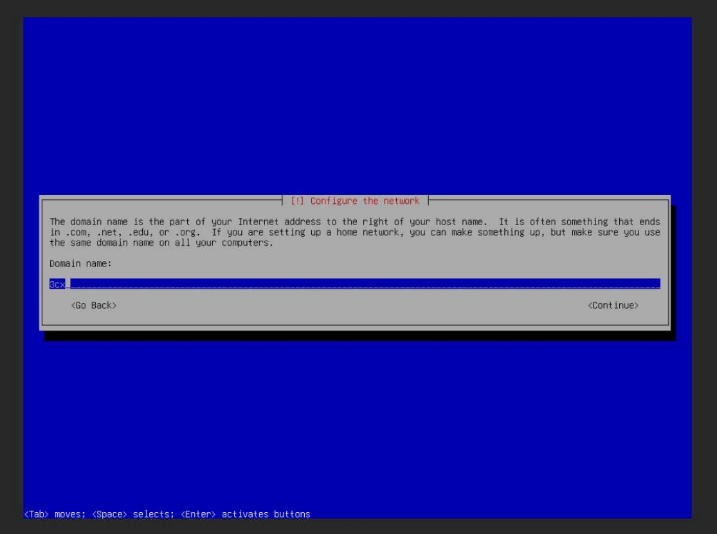
Step 10: Select your preferred language for the installation process and press Enter.
Step 11: Select your preferred location and press Enter.
Step 12: Choose your keyboard layout from the list and confirm.
Step 13: Enter the root password. Note down the password, this will be used to login via SSH.
Step 14: Re-enter the same root password for verification.
Step 15: For partitioning the disk, select the method as “Guided – use entire disk”.
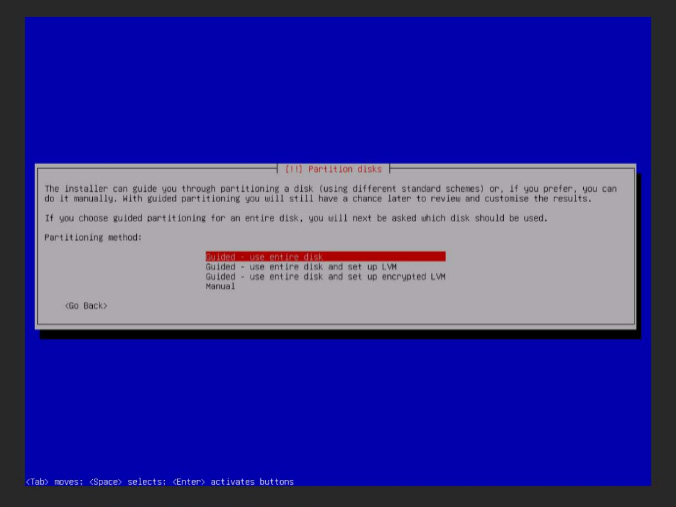
Step 16: Select the “Virtual Disk” for partition. (The Disk Name can be vary based on device model)
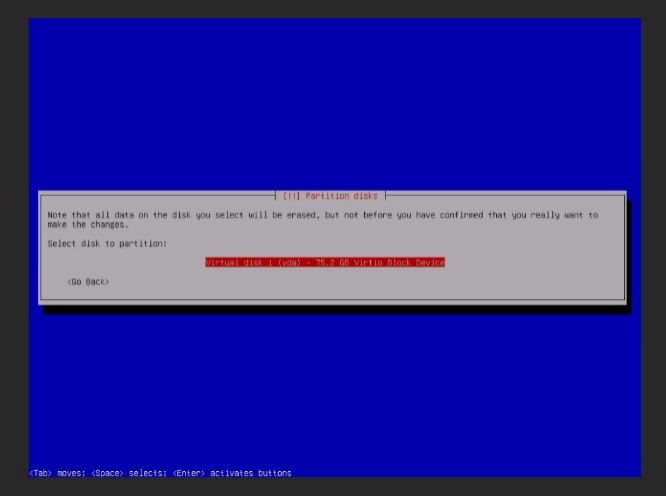
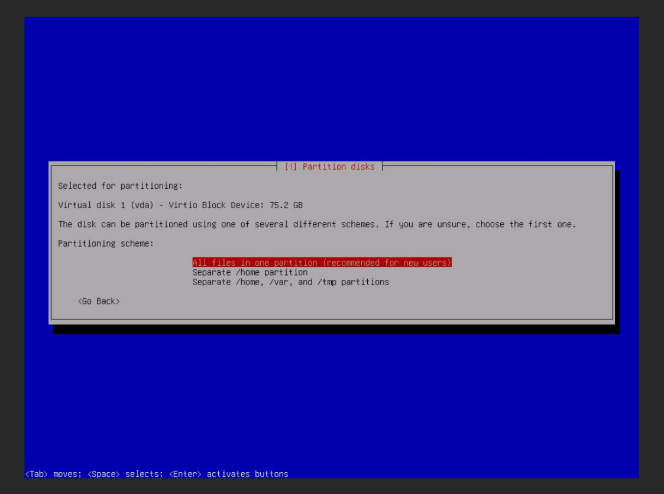
Step 17: Select the Partitioning scheme as “All files in one partition”
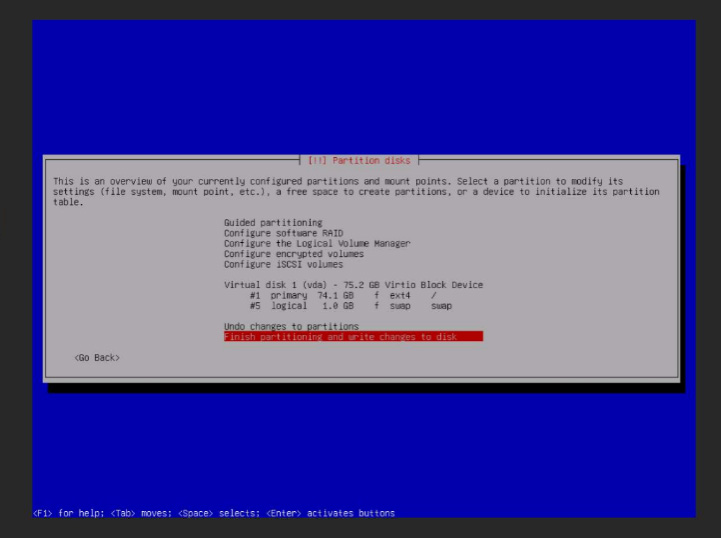
Step 18: Select the option “Finish partitioning and write changes to disk”.
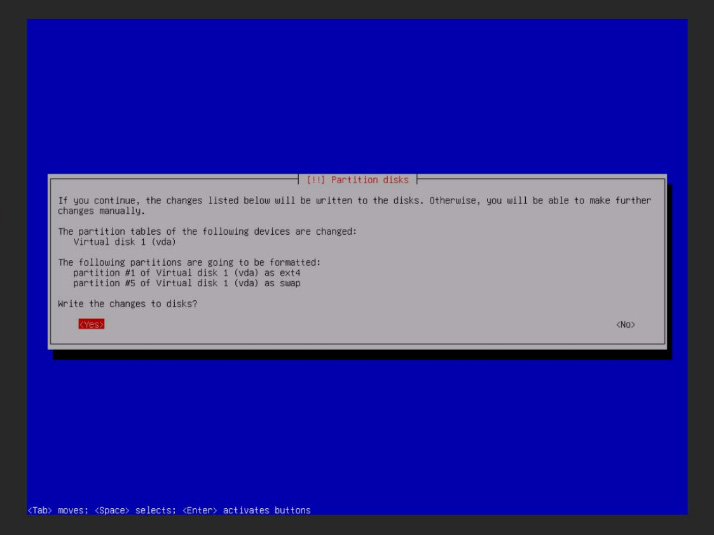
Step 19: Select “Yes” for writing the changes to disk.
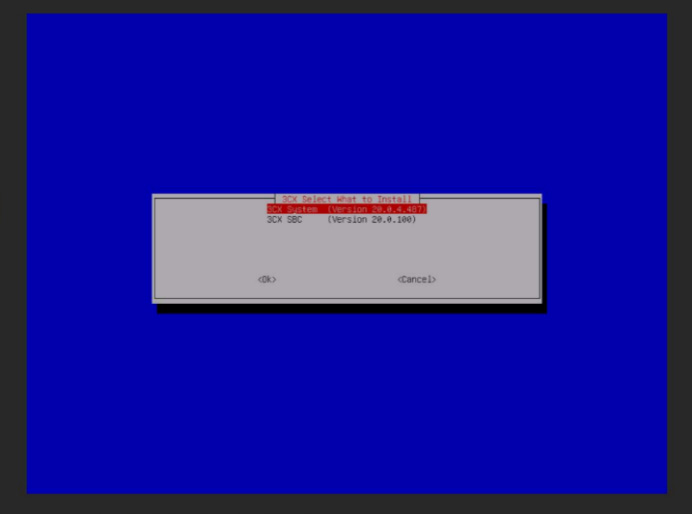
Step 20: Select the “3CX System” to install.
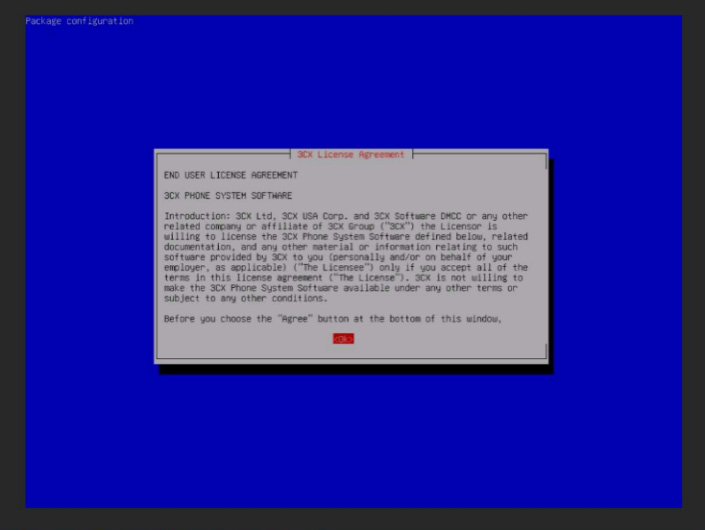
Step 21: Press “OK” for 3CX License Agreement.
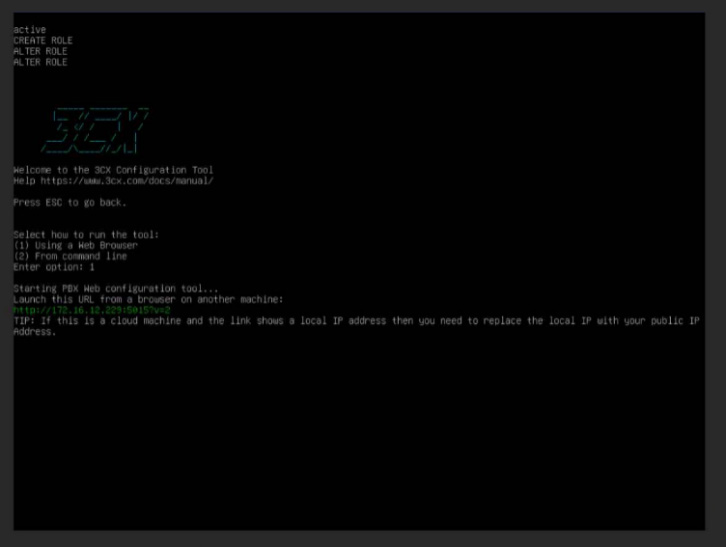
Step 22: After the 3CX file gets installed, Press option 1.
Call4tel Portal Installations:
For Fresh devices, you can access the device via SSH with Port 22. Username as root & Password that you entered in the installation.
You must run the following command via Putty to install the call4tel portal.
For NX32 Devices:
sudo apt update
sudo apt-get update
sudo apt-get upgrade -y
sudo dpkg –configure -a
wget -P /tmp/ ‘http://update.call4tel.com/call4telnx32/call4telnx32install.sh’
chmod 755 -R /tmp/call4telnx32install.sh
sudo /tmp/call4telnx32install.sh
For NX32 Lite Devices:
sudo apt update
sudo apt-get update
sudo apt-get upgrade -y
sudo dpkg –configure -a
wget -P /tmp/ ‘http://update.call4tel.com/call4telnx32lite/call4telnx32liteinstall.sh’
chmod 755 -R /tmp/call4telnx32liteinstall.sh
sudo /tmp/call4telnx32liteinstall.sh
For NX96 Devices:
sudo apt update
sudo apt-get update
sudo apt-get upgrade -y
sudo dpkg –configure -a
wget -P /tmp/ ‘http://update.call4tel.com/call4telnx96/call4telnx96install.sh’
chmod 755 -R /tmp/call4telnx96install.sh
sudo /tmp/call4telnx96install.sh
For NX256RR Devices:
sudo apt update
sudo apt-get update
sudo apt-get upgrade -y
sudo dpkg –configure -a
wget -P /tmp/ ‘http://update.call4tel.com/call4telnx256rr/call4telnx256rrinstall.sh’
chmod 755 -R /tmp/call4telnx256rrinstall.sh
sudo /tmp/call4telnx256rrinstall.sh
For NX256 Devices:
sudo apt update
sudo apt-get update
sudo apt-get upgrade -y
sudo dpkg –configure -a
wget -P /tmp/ ‘http://update.call4tel.com/call4telnx256/call4telnx256install.sh’
chmod 755 -R /tmp/call4telnx256install.sh
sudo /tmp/call4telnx256install.sh
Note: The device will get rebooted. It will take around 5 – 10 mins.
After the Call4tel installation, you can access the device via ssh with Port 998.
Username: admin
Password: Call4te1@@123
Call4tel portal link will be http://wanipaddress:5448
