M1 SIP Trunk Configuration
with NX32

About M1
M1 is one of the three major full-service communications providers in Singapore. It offers a suite of mobile voice-and-data communication services over its 3G/3.5G/4G/LTE-A network, including international-call services to both mobile- and fixed-line customers. These include SMS, MMS, WAP, GPRS, 3G, 3.5G and 4G and was the first Singapore operator to launch a nationwide 4G LTE and 4G LTE-A network. More recently they launched the True 5G network – the first in Singapore to do so.
System Preparation
Network Topology

To use an M1 SIP Trunk with 3CX, the 3CX Server needs to have a second network card which will be used for traffic to and from the M1 servers. The network topology should look similar to the above.

WAN should connect to the main NX32 WAN through which the 3CX Server accesses the internet and will also be the where extensions are connected to.
LAN will only cater for traffic to/from the M1 servers.
Adding Static Routes

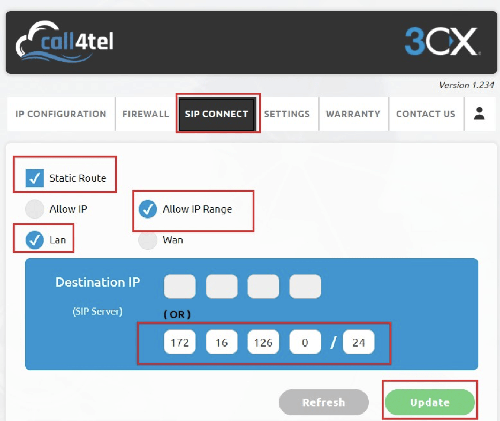
Add a static route so that the traffic from the 3CX server towards the M1 servers is routed through the correct Gateway. To do this on a NX32 Device. Go to the “SIP CONNECT” option in the Call4tel portal.
Once added you will see the above.
The Gateway IP that you need to configure is given to you by M1.
3CX Server NIC Setup
For WAN, apply the necessary network settings required by your network.
For LAN, you must manually configure the M1 WAN IP address that has be given to you and as per the instruction by M1.
3CX Version
Some providers gained support and compatibility with 3CX on a specific product version. It is advisable to always run the latest version of 3CX to ensure ongoing compatibility.
Minimum 3CX Version: 15.5
Provider Capabilities
Below is a short overview of the provider’s capabilities and services and whether they’re supported:
- CLNS (Clip No Screening): No
- Catch All Routing: Yes, static SI per trunk
- Fax in T38: No
- CLIR (Number Suppression): No
- DTMF via RFC 2833: Yes
- Codec Order: G711A,G729, G711U
- NAT Support: Yes
- Other: SRTP is not supported, TLS is not supported
Collecting 3CX Configuration Settings
In order to configure M1 with 3CX, you should first ensure you have the following information available which must be provided to you by your M1 representative:
- Your DID numbers
- The M1 SIP Server IP address
- Your M1 WAN IP Address
With the above information you can proceed to the next section which explains how you use this information to configure the Trunk in 3CX.
Configuring the Trunk with 3CX
Adding the Trunk
The general instructions outlining how to add a new SIP Trunk to 3CX can be found here.
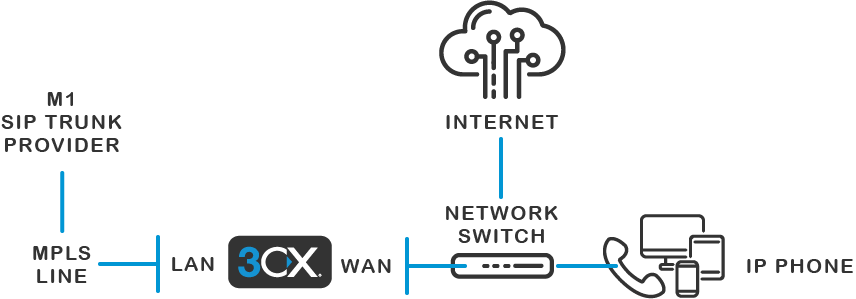
Additionally, for M1, you must also have a dedicated NIC for traffic to/from the Provider. The instructions for this are provided in section “System Preparation” and must be done prior to the following.
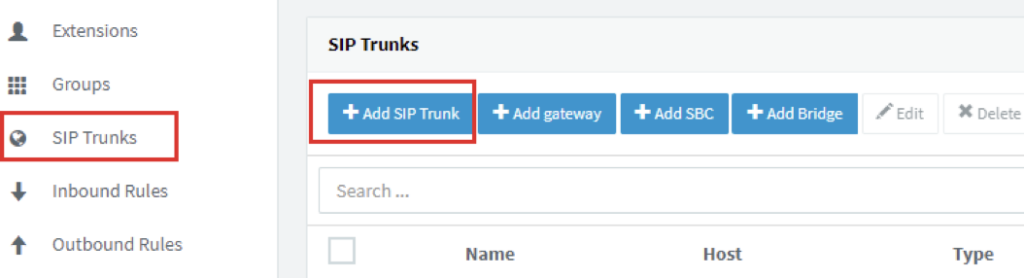
To add M1 to your 3CX system, open the Management Console and navigate to “SIP Trunks”. Press the “Add SIP Trunk” button.
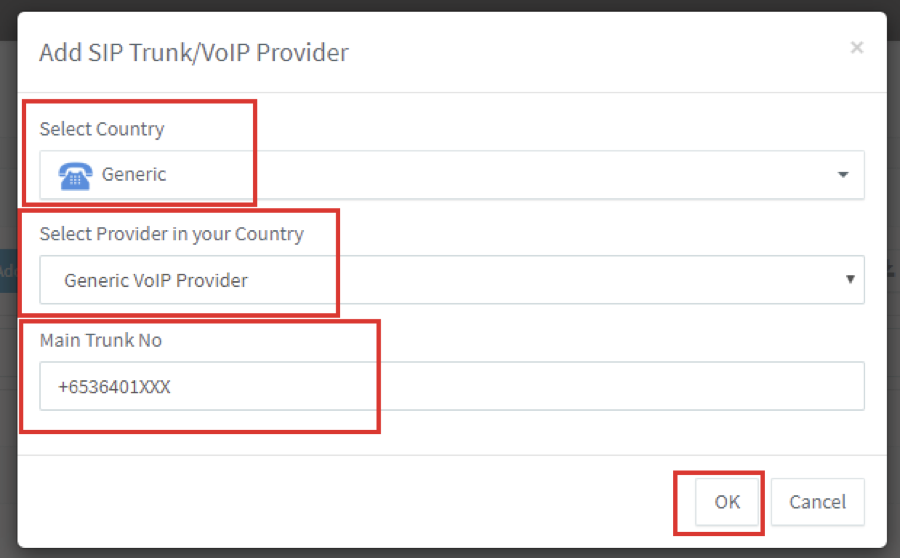
Select “Generic” as the country and then “VoIP Trunk Provider” from the following drop-down.
In the “Main Trunk No” field, enter one of your DID numbers, then press OK.


Once you have done the above, press OK and your Trunk will now be configured.
Adding Additional DIDs
To associate all other DIDs/Numbers you have on your M1 Trunk, what you need to do is go to the Management Console → SIP Trunks, double-click on your M1 Trunk and go to the “DIDs” tab.
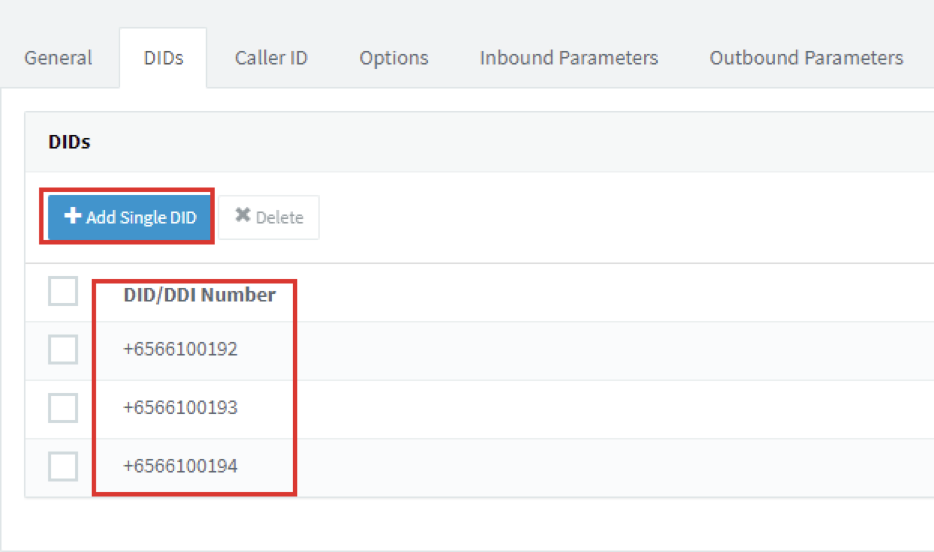
Here you should already see 1 entry that is the Main Trunk number you have set. Add all other DIDs/Numbers you have to the list in the National Number format.
Creating Inbound Rules
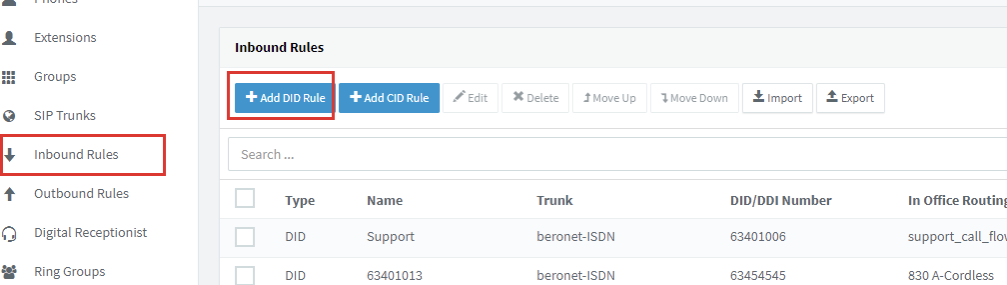
Now that you have associated all your DIDs/Numbers with your SIP Trunk in 3CX, you can create Inbound Rules to set where calls will be routed when those numbers are called.
Number Format
Outbound Caller ID
When making Outbound Calls using your M1 SIP Trunk, you can present any of your DIDs as the Outbound Caller ID. Note though that because Clip No Screening is not supported, you cannot present any numbers that you don’t have associated with your Trunk.
Outbound Rules
There are no special instructions regarding Outbound Rules, numbers can be dialed in any valid format.
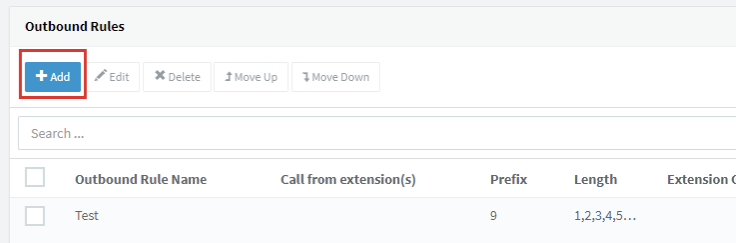
Go to outbound Rules & Add outbound rule
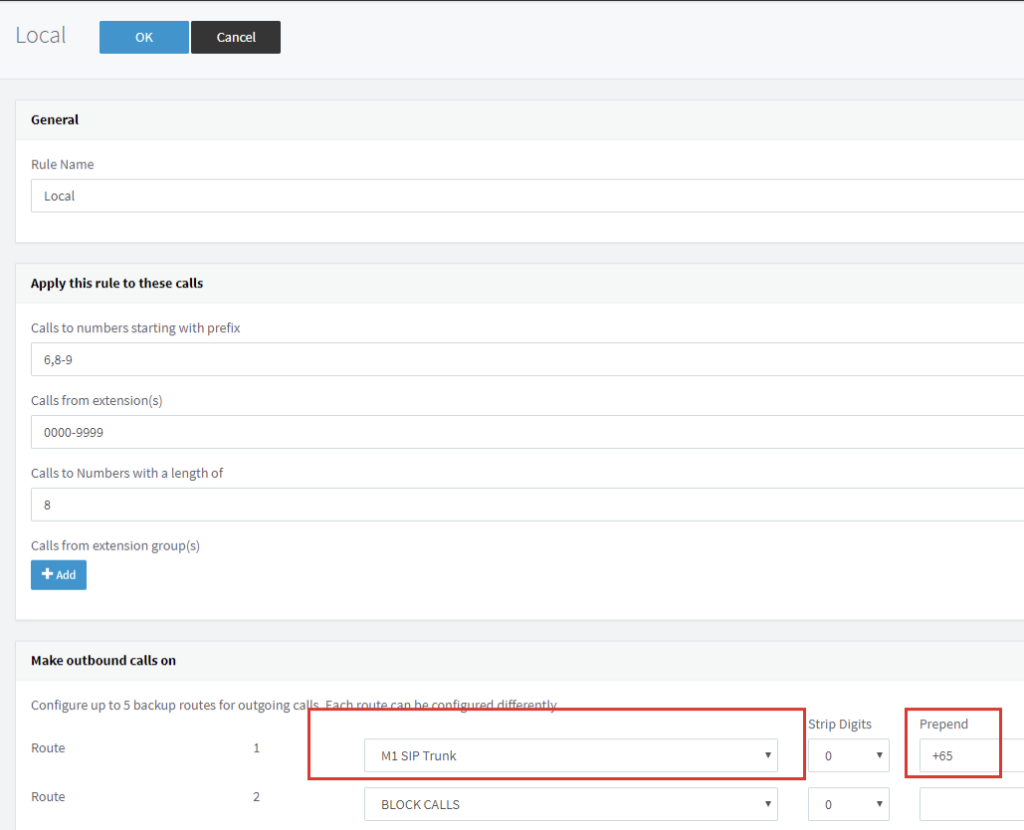
Outbound caller ID should be added in all extensions outbound caller ID settings.